Enable credential vending for an external catalog
With credential vending, you can use Snowflake Open Catalog to configure and manage access control to a catalog and its underlying cloud storage in a single place. For internal catalogs, credential vending is enabled by default. For external catalogs, you can enable credential vending by using one of the following options:
Important
Before you enable credential vending for an external catalog, ensure that your tables in the catalog don’t have overlapping storage directory locations. Otherwise, a user could gain access to tables that they shouldn’t have permission to access. For more information, see Credential vending for external catalogs.
Using Open Catalog
Sign in to Open Catalog.
In the menu on the left, select Catalogs.
In the list of catalogs, select the catalog for which you want to enable credential vending.
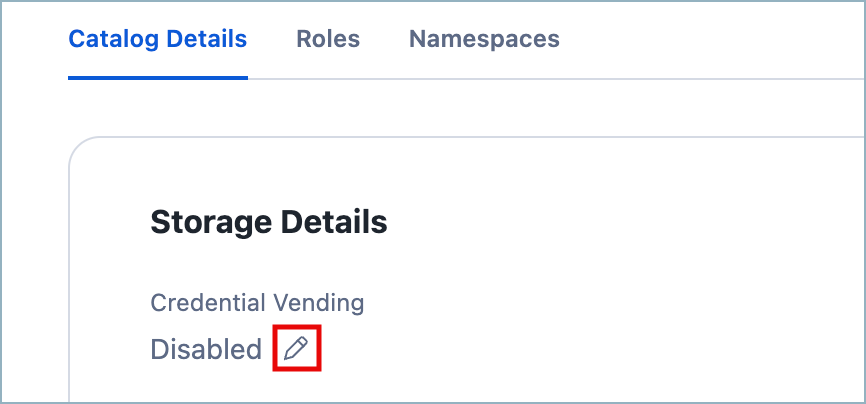
On the Catalog Details tab, under Storage details, under Credential Vending, select the Edit icon.

From the popup that appears, select Enable.
Apache Polaris™ (Incubating) CLI
This section describes how to enable credential vending for an external catalog by using the Polaris CLI. The Apache Polaris (Incubating) CLI is a command line interface for customers to programmatically update settings. For more information, see Apache Polaris (Incubating) CLI.
To enable credential vending for an external catalog, use a service connection with the Polaris CLI.
Step 1: Prepare a service connection with the necessary privileges
Create a principal role to assign to the new service connection. Skip this step if you already have a principal role to assign to the service connection.
Configure a service connection and save the Client ID and Client Secret to use later with the Polaris CLI. Skip this step if you already have a service connection to use the Polaris CLI.
Create a catalog role in the target catalog(s) to grant it with the privileges needed to enable credential vending. Skip this step if you already have a catalog role to use for enabling credential vending.
Secure the target catalog. When securing it, ensure the catalog role has at least one of the following privileges granted to it:
CATALOG_MANAGE_CONTENT
CATALOG_MANAGE_METADATA
CATALOG_WRITE_PROPERTIES
To enable credential vending, the service principal used to perform this operation must have one of these privileges granted to it.
Step 2: Run the CLI command
To run the CLI command, see the applicable steps for your environment:
Run the CLI command as a Linux or Mac user
Prerequisites
Before you run the CLI command, you should meet the following prerequisites for your environment:
To run the CLI command in Linux or Mac, follow these steps:
Clone the Apache Polaris™ GitHub repository by running the following command:
git clone https://github.com/apache/polaris.git
For instructions on how to clone a GitHub repository, see Cloning a repository.
Define the following environment variables for the CLI command:
export CLIENT_ID=<client-id>
export CLIENT_SECRET=<client-secret>
export sfAccountUrl=https://<open_catalog_account_identifier>.snowflakecomputing.com
export catalogName=<my-catalog>
Where:
sfAccountUrlis the following URL:https://<open_catalog_account_identifier>.snowflakecomputing.com. For<open_catalog_account_identifier>, specify the account identifier for your Open Catalog account. Depending on the region and cloud platform for the account, this identifier might be the account locator by itself (for example,xy12345) or include additional segments. For more information, see Using an account locator as an identifier.CLIENT_IDis the client_id for your service connection that you saved.CLIENT_SECRETis the client_secret for your service connection that you saved.catalogNameis the name of the external catalog you want to enable credential vending for.
From the directory that you cloned the Apache Polaris repo into, run the Polaris CLI:
./polaris \
  --base-url "${sfAccountUrl}/polaris" \
  --client-id ${CLIENT_ID} \
  --client-secret ${CLIENT_SECRET} \
  catalogs \
  update "${catalogName}" \
  --set-property "enable.credential.vending"="true"
Run the CLI command as a Windows user
Prerequisites
To run the following code, you need Docker installed in the Windows machine.
Create a Dockerfile using the following code example:
FROM python:3.11

# install git
RUN apt-get update && apt-get install -y git

# get polaris
RUN git clone https://github.com/apache/polaris.git

WORKDIR /polaris

RUN pip install --upgrade pip

# install polaris cli
RUN ./polaris --help
From the folder where the Dockerfile is located, build the docker image for Polaris CLI with the following command:
% docker build -t polaris-cli . 0.0s
Run the docker container and bash terminal with the following command:
% docker run --rm -it polaris-cli /bin/bash
root@ae4c8353b45f:/polaris#
Run the following code to update the catalog to set the property
enable.credential.vendingtotrue:% docker run --rm -it polaris-cli /bin/bash root@ae4c8353b45f:/polaris# export CLIENT_ID=<client-id> export CLIENT_SECRET=<client-secret> export sfAccountUrl=https://<open_catalog_account_identifier>.snowflakecomputing.com export catalogName=<my-catalog> root@ae4c8353b45f:/polaris# ./polaris \ --base-url "${sfAccountUrl}/polaris" \ --client-id ${CLIENT_ID} \ --client-secret ${CLIENT_SECRET} \ catalogs \ update "${catalogName}" \ --set-property "enable.credential.vending"="true"
Run the following code to validate that the parameter
enable.credential.vendingwas configured correctly:root@ae4c8353b45f:/polaris# ./polaris \ --base-url "${sfAccountUrl}/polaris" \ --client-id ${CLIENT_ID} \ --client-secret ${CLIENT_SECRET} \ catalogs \ get "${catalogName}" {"type": "EXTERNAL", "name": "<my-catalog>", "properties": {"default-base-location": "s3://<bucket-name>/polaris/my-catalog-v2-storage/", "enable.credential.vending": "true"}, "createTimestamp": 1722547448827, "lastUpdateTimestamp": 1730906335286, "entityVersion": 3, "storageConfigInfo": {"storageType": "S3", "allowedLocations": ["s3://<bucket-name>/polaris/my-catalog-v2-storage/"], "roleArn": "arn:aws:iam::<aws-account-id>:role/<polaris-aws-role>"}}